
Salesforce queues are a collection of records that don’t have any owner. Users who have access queues can view the data that exist in them and can also claim ownership of any record. Queues in Salesforce help to prioritize, distribute and assign records.
It becomes useful in the case of a single project where a large number of people are working together to share the workload. These queues are conventionally used in sales and support organizations where new leads and support cases are distributed to the users with the most availability or capacity.
The Salesforce CRM essentially supports queues for cases, leads, and for other custom objects. The main benefit of queues is that it makes sharing the workload easy. Also, it provides visibility into what needs attention on priority.
How Can Records be added in Queues?
Queue characteristics are similar to that of a record owner. They can be added in two ways. The first is manual, this can be done by changing or updating the owner of the record.
The second way to add records in queues is with the help of criteria-based assignment rules. The records get added automatically when they are created. Multiple cases and leads can be added to the queues based on the specific record criteria. For instance, a lead assignment rule can add leads from Germany to the “New lead Germany Queue“.
Records remain in queues until someone picks them up or until an owner is given to the entire group. Queues members on the other hand can also claim the ownership of records.
Adding Members To Queues
Members can be added to queues by the salesforce admin. They can be added individually one by one, as multiple users at once (roles, roles, subordinates, and public groups). Any user higher in the role hierarchy is also eligible to take ownership of records existing in the queue.
Steps To Create Salesforce Queues
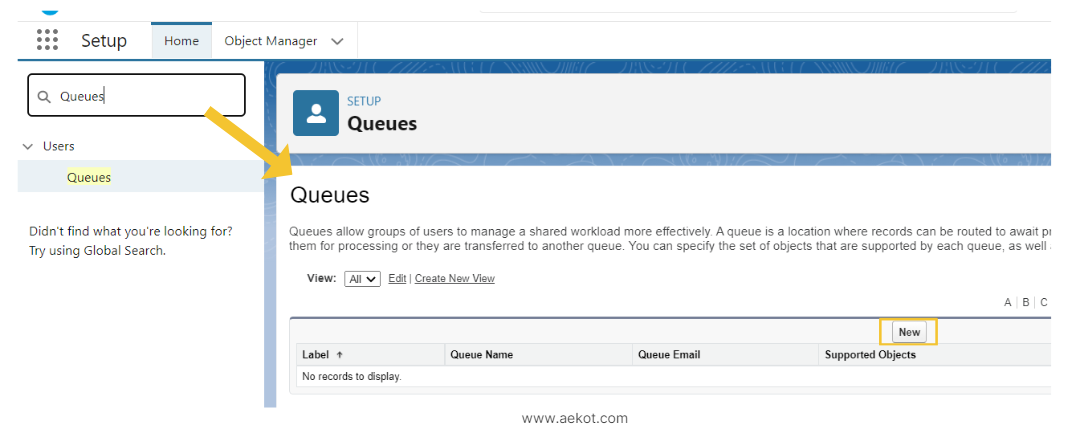
Step 1:
Search for Queues in the Salesforce Quick Find Box and then Click on Queues and on New.
Step 2:
Enter a label. For this example, we will use ‘FMCG’ Leads. The queue name will populate automatically. Then fill in the Queue Name field and Queue Email Field.
Also, don’t forget to click on the Send Email to Members checkbox. It will notify and update the Queue members.
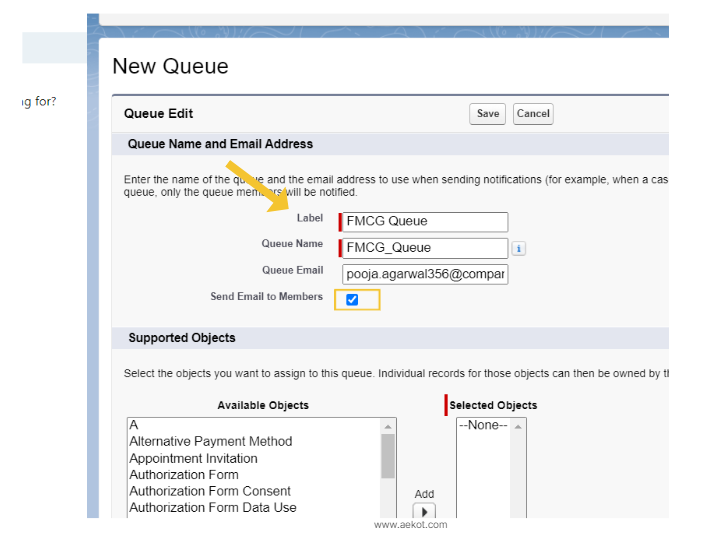
Step 3:
Select which Objects you want to include. In this case, we are going to include Lead. Click on Add to migrate Lead into Selected Objects.

Step 4:
Next, add members to the queue. Members can include Individuals, Public Groups, Roles, Roles and. Subordinates.
Your sharing settings will dictate who can take ownership of records in the queue (Members and users above in the role hierarchy can claim ownership of records).
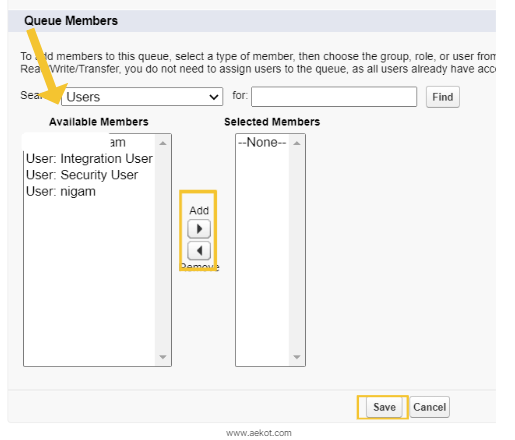
Step 5:
Click on Save.
The organization-wide settings or OWD sharing model determines the permissions available to the users for the object records in the queue. Following are those permissions:
Public Read/Transfer
The records can be viewed by the users within the Salesforce Organization.
Public Read Only
Users can view every queue, however, they can take ownership of records of which they are members or if they are higher in the role hierarchy of a particular queue member.
Private
Only the users who are members can view and accept records. The private queue is far more secure than other queues. You also need to be on a higher level in the role hierarchy than other queue members.
The Salesforce Queues make it easy to share workloads especially when a team member is sick or on a leave. Queues are a smarter way to work. They bring users together and help to gain more visibility and assist in what work needs attention on priority.